Authorization code flow
Connect to Planday directly from you own application to receive the required access token for accessing Plandays API resources. Follow the guidelines below to manage the authorization code flow.
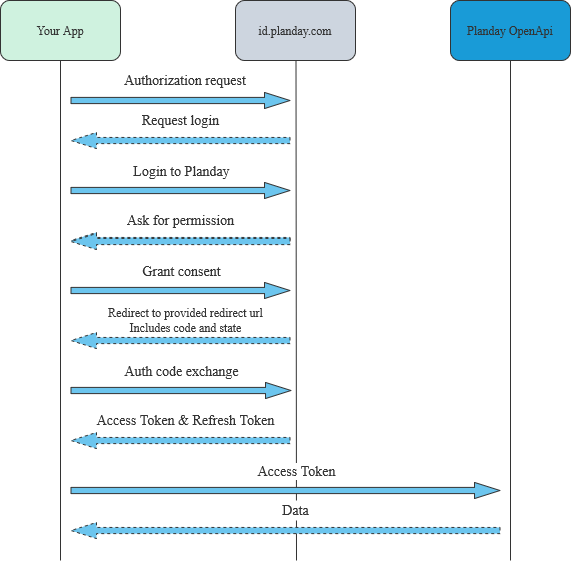
The Authorization Code grant type is used by API applications integrating to Plandays API to exchange an authorization code for an access token. Allow the user to trigger the authorisation flow from your system by implementing the following flow:
- Your system sends the user to Planday’s authentication server.
- The user is directed to the Planday authorization / consent screen and approves the app’s request.
- The user is redirected back to your system with an authorization code in the query string.
- Your system exchanges the authorization code for a refresh token and an access token.
- Your system automatically handles the continuous refresh token exchange.
Requirements and limitations
- The Planday OpenApi requires HTTPS.
- Planday OAuth access tokens expire after 1 hour. After expiration, applications must generate a new OAuth access token using the refresh token received when the authorization was first granted.
- Refresh tokens do not expire. However, if you lose a refresh token or the user revokes the access, you must repeat the full OAuth authorization code flow to obtain a new OAuth access token and a refresh token.
Flow for authorization code exchange
- Authorization request to id.planday.com
- Consent page
- Authorization code capture
- Code exchange
- Refresh Token / Access Token
- Revoke token / Disconnect
1. Authorization request to id.planday.com
Your application should redirect the user to the following address:
https://id.planday.com/connect/authorize?client_id={clientId}&response_type=code&redirect_uri={redirectUri}&scope={scopes}&state={state}
client_id
[Required] The value for APP ID you received when creating your application. You can check the ID on your portal by going to “API Access” page on your Planday portal.
redirect_uri
[Required] The URL value for Redirection URL you set when you created your application. You can set up to 3 redirect urls for your application (use localhost for development purposes). Please remember to url encode this value.
response_type
[Required] The value must be code indicating the code authorization grant type is required and an authorization code is desired in the response.
scope
[Required] This should contain all the scopes you’ve selected when creating your application and the following scopes as well: openid offline_access. It should be a space-separated list, please see example under state.
You can find the scope names under each API i the API documentation.
state
[Optional] Use this parameter to pass a unique value that will be returned to you after user completes the authorization. Use this if you want to make your app more resilient to CSRF attacks.
curl --location --request GET 'https://id.planday.com/connect/authorize?
client_id=f2370889-3ffe-46b6-83e7-1a20f5a20d2f&scope=openid%20offline_access%20employee:read&
redirect_uri=http://example.com/code&response_type=code&state=xyzABC123'
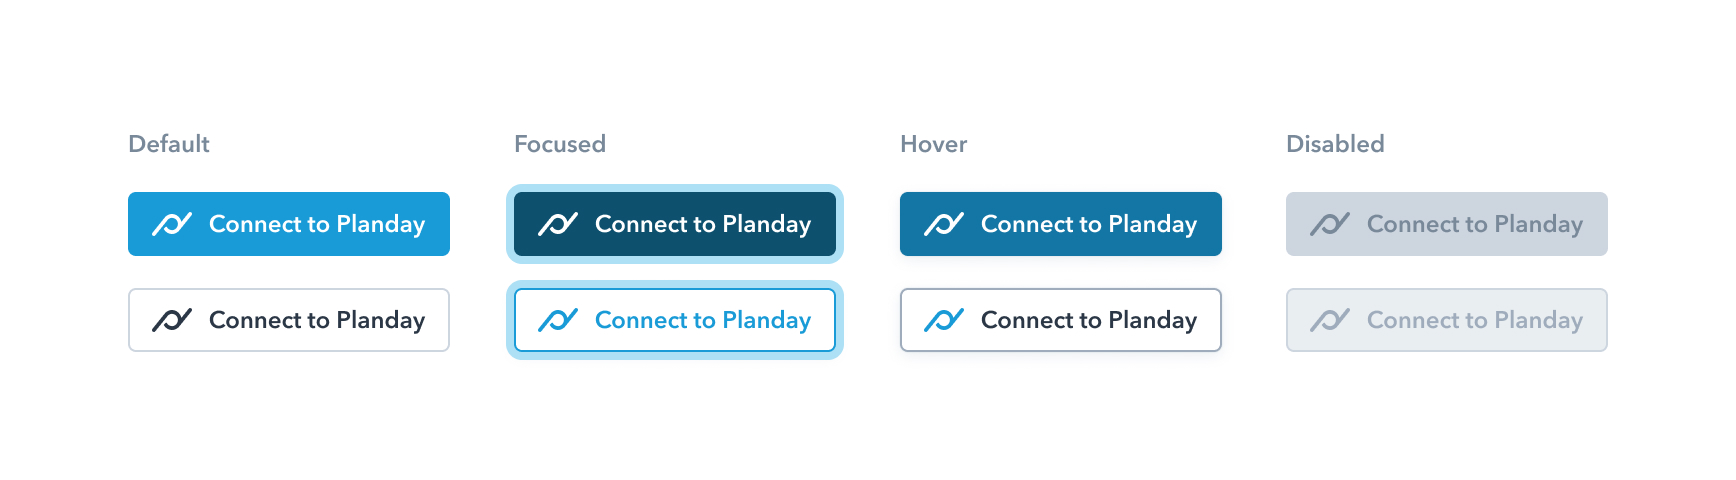
We recommend using one of our graphics for a button that will take the your users to Planday.
2. Consent page
User of your application will be redirect back to Planday’s login page. Here he will be able to either enter his portal address/or selected one of the portals to which he has recently logged into. He will be then shown a consent screen where all of the requested scopes for your application will be listed. After giving consent the user will be redirected to the URL specified in the authorization request
3. Authorization code capture
Planday will redirect back to the url specified in the redirect_uri parameter. We will append to an HTTP query string to with values for code and state (if provided in auth requests).
{redirectURL}?code={code}&state={state}
code
One-time use authorization code that you should use in order to obtain an access and refresh token.
state
We will return the value you’ve provided with the authorization request, so that you can verify it and prevent CSRF attacks.
4. Code exchange
You can now exchange the code for an OAuth access token. Your application will need to make the following POST request to Planday’s token endpoint:
https://id.planday.com/connect/token
The body of the request should contain four parameters
- client_id - your application id
- grant_type - authorization_code
- code - authorization code you’ve extracted in the 3rd step
- redirect_uri - redirection url you’ve set up for your application
POST https://id.planday.com/connect/token
Content-Type: application/x-www-form-urlencoded

client_id={applicationId}
&grant_type=authorization_code
&code={code}
&redirect_uri=https://myapp.com/redirect
5. Access Token and Refresh Token
Planday will verify all of the provided parameters with the request. If everything goes well you will receive a response with data in JSON format containing the access token.
{
    "id_token": "eyJhbGciOiJSUzI1NiIsImtpZCI6IjgyQjU1OEI2NDA3QTkwRTlCRjIzMzYyQUM2M0E3NTdDMjNFQ0FC",
    "access_token": "eyJhbGciOiJSUzI1NiIsImtpZCI6IjgyQjU1OEI2NDA3QTkwRTlCRjIzMzYyQUM2M0E3NTdDMjNFQ0FCM",
    "expires_in": 3600,
    "token_type": "Bearer",
    "refresh_token": "VxLtcy_OWkWoPKqs4uFhTg",
    "scope": "openid shift:read offline_access"
}
The returned JSON object will contain other properties such as:
id_token
The token containing user identity details.
access_token
The access token value. Use this token to access Planday’s OpenApi resources.
expires_in
The remaining lifetime of the access token measured in seconds.
refresh_token
Token that should be used to acquire a new access token.
token_type
This value will always be ‘Bearer’
scope
Enumeration of scopes
You can now use the access token to access Planday’s resources. To get some basic information about the company you can use the Portal Api.
6. Revoke token / Disconnect from Planday
In some cases your users would like to disconnect from Planday. To revoke a token you need to send a POST request from your application to revoke endpoint.
POST https://id.planday.com/connect/revocation
Content-Type: application/x-www-form-urlencoded

client_id={yourAppId}
&token={refreshToken}
client_id
[Required] The value for APP ID you received when creating your application. You can check the ID on your portal by going to “API Access” page on your Planday portal.
token
[Required] RefreshToken received in step 5